Install Oktavia to Sphinx
Using this search engine with Sphinx is easy.
There are two steps to install Oktavia to your Sphinx document.
- Prepare index file
- Change Sphinx template
Prepare Index File
Download Oktavia tools and libraries from github.
This document assumes oktavia folder is in your Sphinx doucment folder.
Install node.js if you didn’t try tutorial. The index generator needs node.js to run. node.js website provides detail information to install node.js to any platforms.
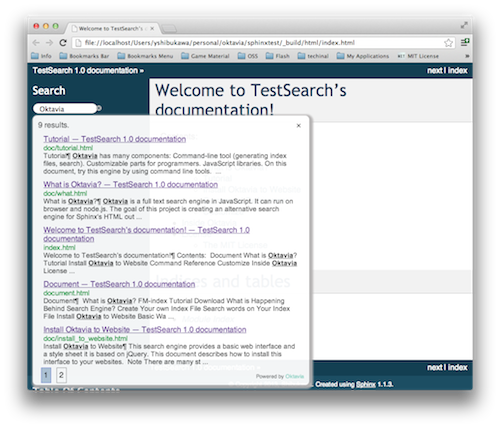
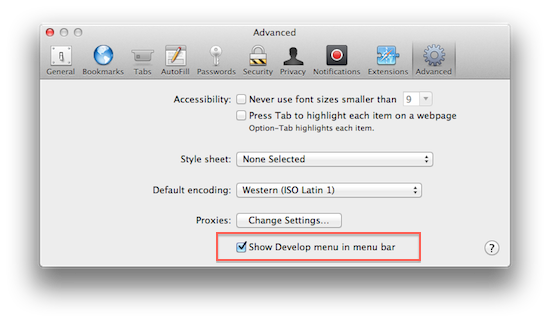
At first, open your resulting document by a browser. WebKit based browsers for PC (Google Chrome, Safari) provide a useful tool. If you are using Safari, check “Show Develop menu” option.
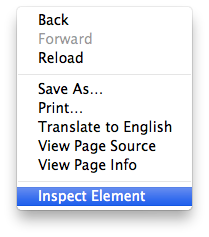
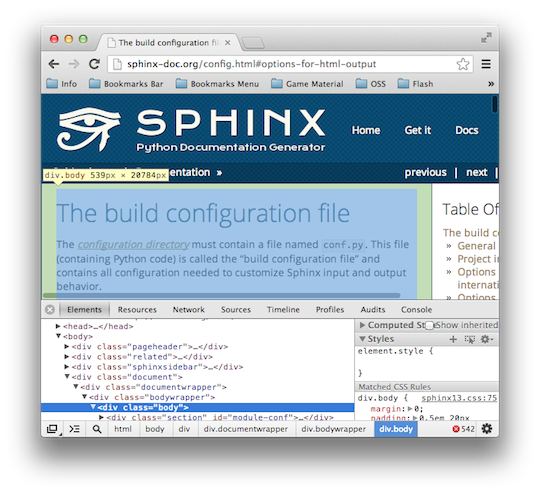
Move a mouse cursor on the content and select “Inspect Element” from a context menu. You can see which tag contains page content. <div class="body"> tag keeps content in most cases unless you use a fully customized original theme.
You can create index file by using following command:
$ oktavia/bin/oktavia-mkindex -i _build/html -r _build/html
   -m html -u file -f .body -c 5
If your content is not in <div class="body"> tag, modify -f .body part.
If your Sphinx project uses Separate source and build directories option, change -i and -r options to following:
$ oktavia/bin/oktavia-mkindex -i build/html -r build/html
The meaning of -u option and -c option are described in Tutorial.
Check the index generator’s Source text size: line. If this number is fewer than 100 bytes, -f parameter is wrong.
Can you see _build/html/search/searchindex.js file? If the file extension is not .js, You use wrong -t option.
Then add a line to run the index generator into html section to run the index generator every time you build Sphinx document.
html:
        $(SPHINXBUILD) -b html $(ALLSPHINXOPTS) $(BUILDDIR)/html
        oktavia/bin/oktavia-mkindex -i _build/html -r _build/html -m html -u file -f .body -c 5
        @echo
        @echo "Build finished. The HTML pages are in $(BUILDDIR)/html."
Note
- From version 0.5, .js output become default. You don’t have to add -t js explicitly.
Change Sphinx Template
There is a template in the github repository.
After creating a project folder (by using sphinx-quickstart), copy needed files into a _static folder.
- oktavia-search.js or oktavia-*-search.js
- oktavia-jquery-ui.js
- searchstyle.css
You don’t have to add the oktavia-jquery-highlight.js because Sphinx already has a search word highlighting feature.
Add a search form entry point to a HTML template.
Add following contents into your _templates/layout.html or copy the file in the template.
{% extends "!layout.html" %}

{% block sidebarlogo %}
{{ super() }}
<div class="sidebarRow">
   <script type="text/javascript" src="{{ pathto("_static/oktavia-search.js", 1) }}"></script>
   <script type="text/javascript" src="{{ pathto("_static/oktavia-jquery-ui.js", 1) }}"></script>
   <link rel="stylesheet" href="{{ pathto("_static/searchstyle.css", 1) }}" type="text/css" />
   <h3>Search by Oktavia</h3>
   <div id="oktavia_search_form" data-index="search/searchindex.js"></div>
</div>
{% endblock %}
If you override sidebarsearch block, it is appear the bottom of a sidebar. Above case shows the top of a sidebar.
Suppress an existing search form.
Add an empty _templates/searchbox.html file or add following lines to _templates/layout.html:
{% extends "!layout.html" %}

{% block searchbox %}
{% endblock %}
Tweet